> ## Documentation Index
> Fetch the complete documentation index at: https://docs.crotus.io/llms.txt
> Use this file to discover all available pages before exploring further.
# Automatic review emails
## Overview
We provide an automated email system for sending review requests, especially useful for automating review collection.
## Use cases
These example events are a great time to send a review request:
* When a user signs up to your service
* After someone uses your product for a while (i.e. 2 weeks)
* After a customer completes a purchase
* Following a support interaction or service delivery
* After releasing an important update to your product
## How it works
### Email templates
Automatic emails build on the concept of templates. You can configure one or multiple custom templates in the Crotus dashboard to personalize your review requests.
### Dynamic content with placeholders
Placeholders allow for personalized emails by inserting dynamic content. Common placeholders include:
* `{{user_name}}`: The user's name
* `{{product_name}}`: The name of your product
Note: You can define any custom placeholders as needed. Use lowercase letters and underscores for compatibility with
the SDK.
To define a placeholder, use the double-curly-brace syntax. For example: `{{user_name}}`. Especially when using the SDK, make sure to only use lowercase letters and underscores so you can provide them as a JavaScript object.
## Setting up automatic review emails
### Step 1: Create a template
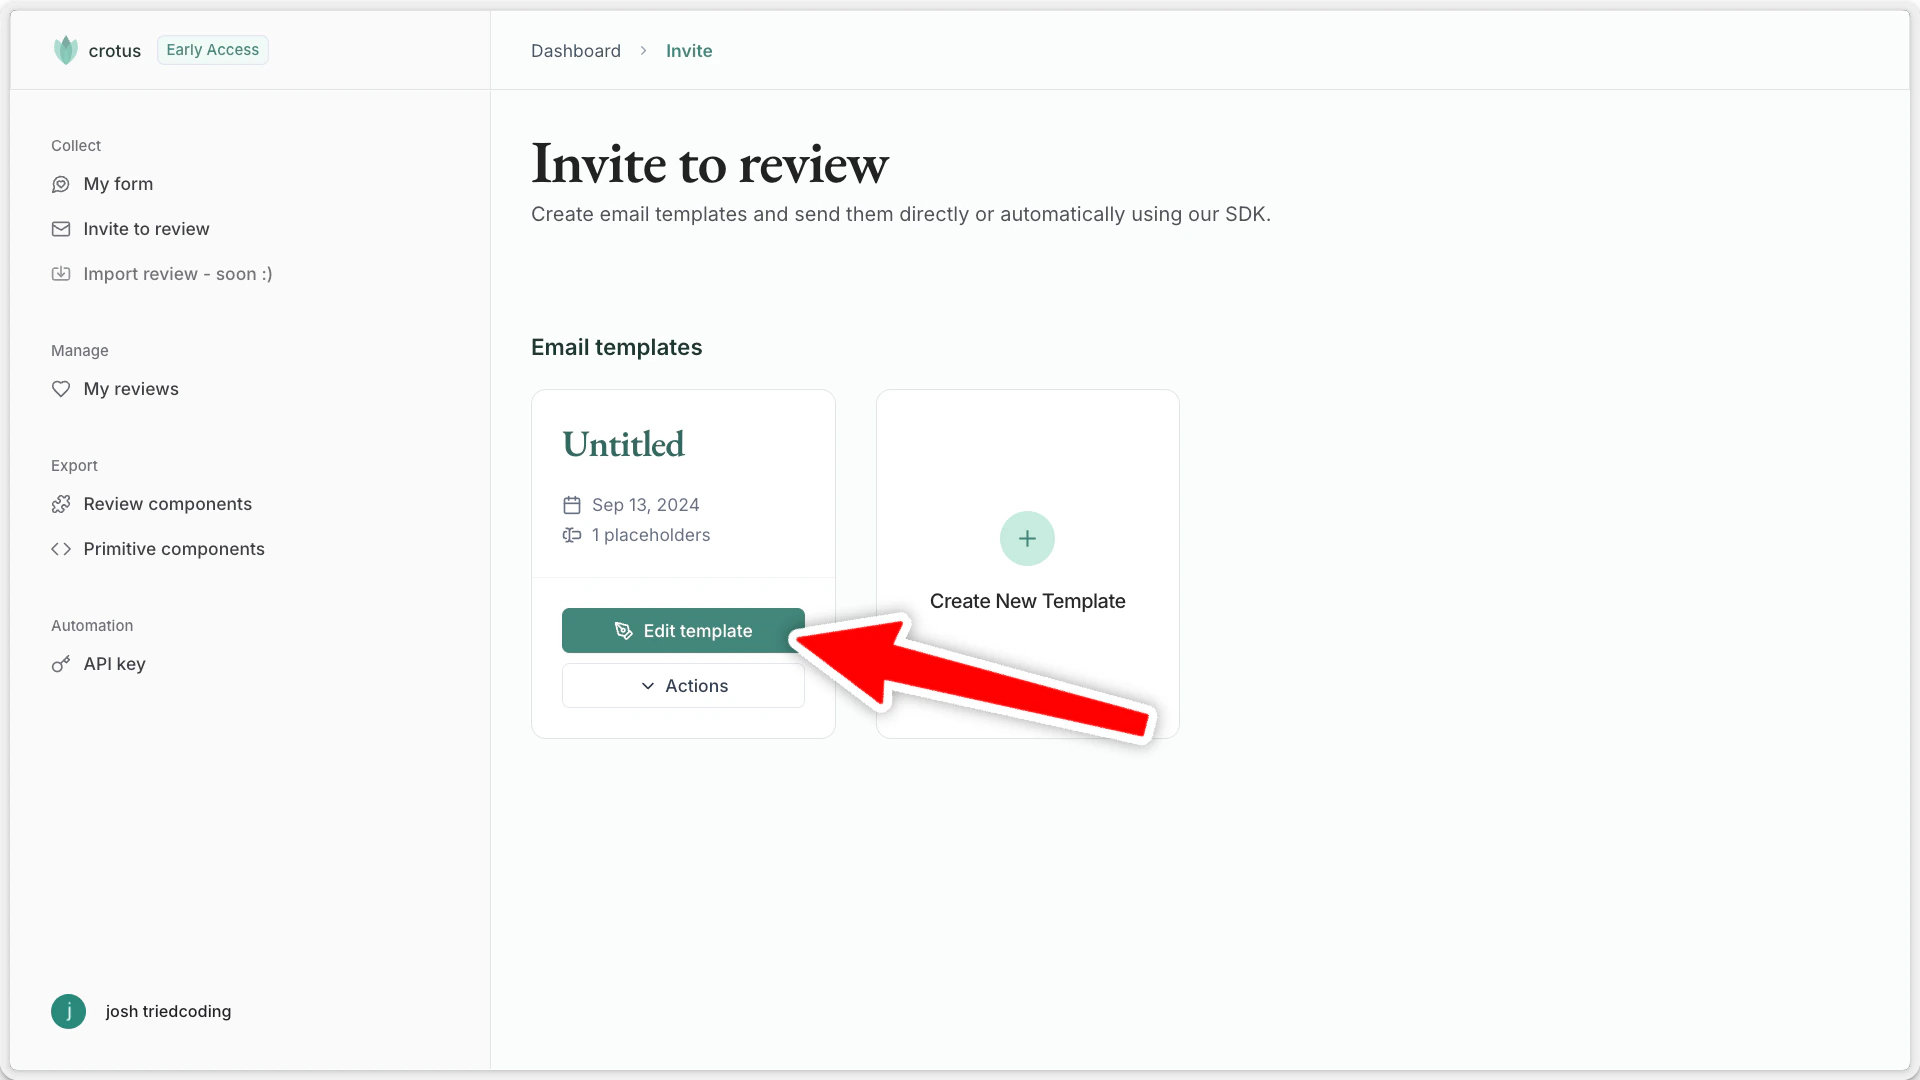
1. Navigate to `Invite to review` in your crotus dashboard.
2. Create a new template or modify an existing one.
 ### Step 2: Configure template settings
Define the following:
* **Template name**
* **Sender name** (as it will appear in recipient's inbox)
* **Reply-to email address**
* **Email subject and body** (using placeholders in the body as needed)
### Step 3: Send emails
#### Option A: Directly via email
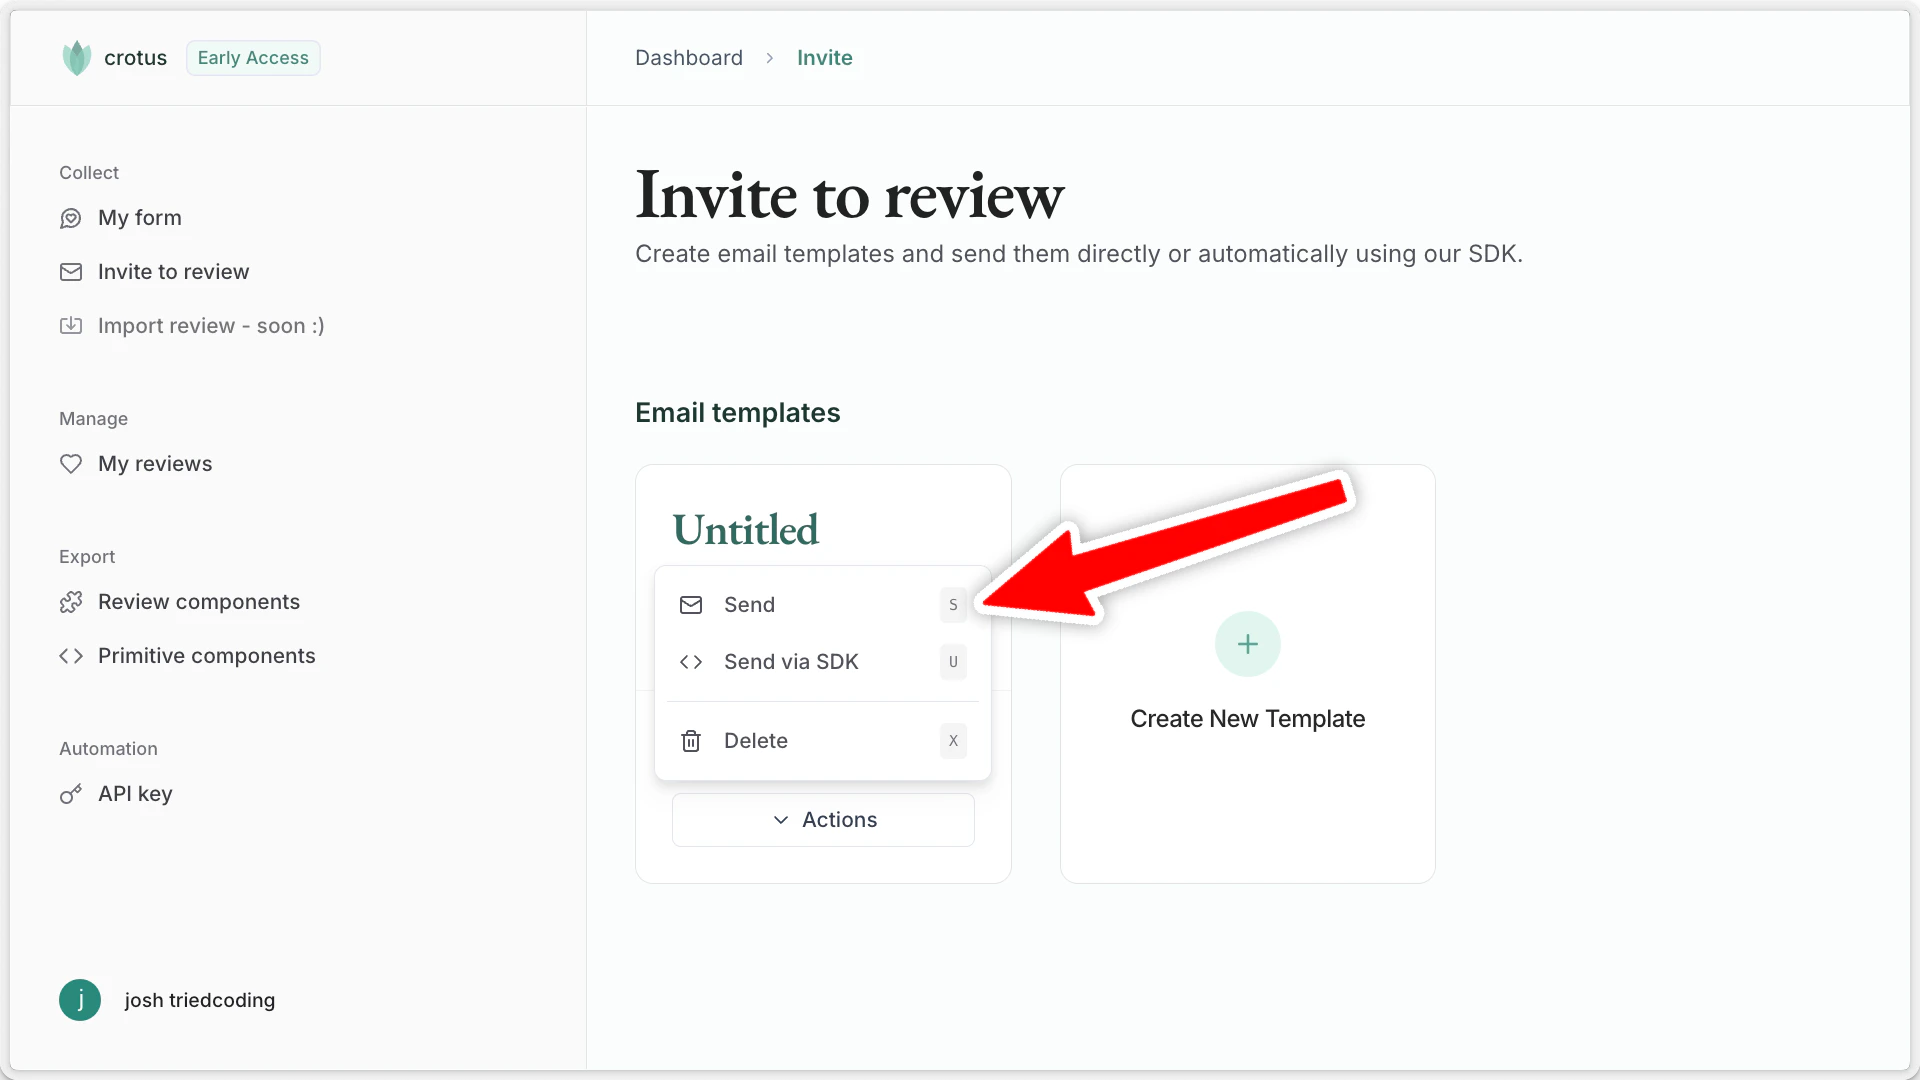
1. Select Actions -> Send on the desired template.
2. Enter recipient details and fill out placeholders.
3. Send the email.
### Step 2: Configure template settings
Define the following:
* **Template name**
* **Sender name** (as it will appear in recipient's inbox)
* **Reply-to email address**
* **Email subject and body** (using placeholders in the body as needed)
### Step 3: Send emails
#### Option A: Directly via email
1. Select Actions -> Send on the desired template.
2. Enter recipient details and fill out placeholders.
3. Send the email.
 #### Option B: Using the SDK
1. Set up the Crotus SDK (see the [quickstart guide](/quickstart)).
2. Copy the code snippet:
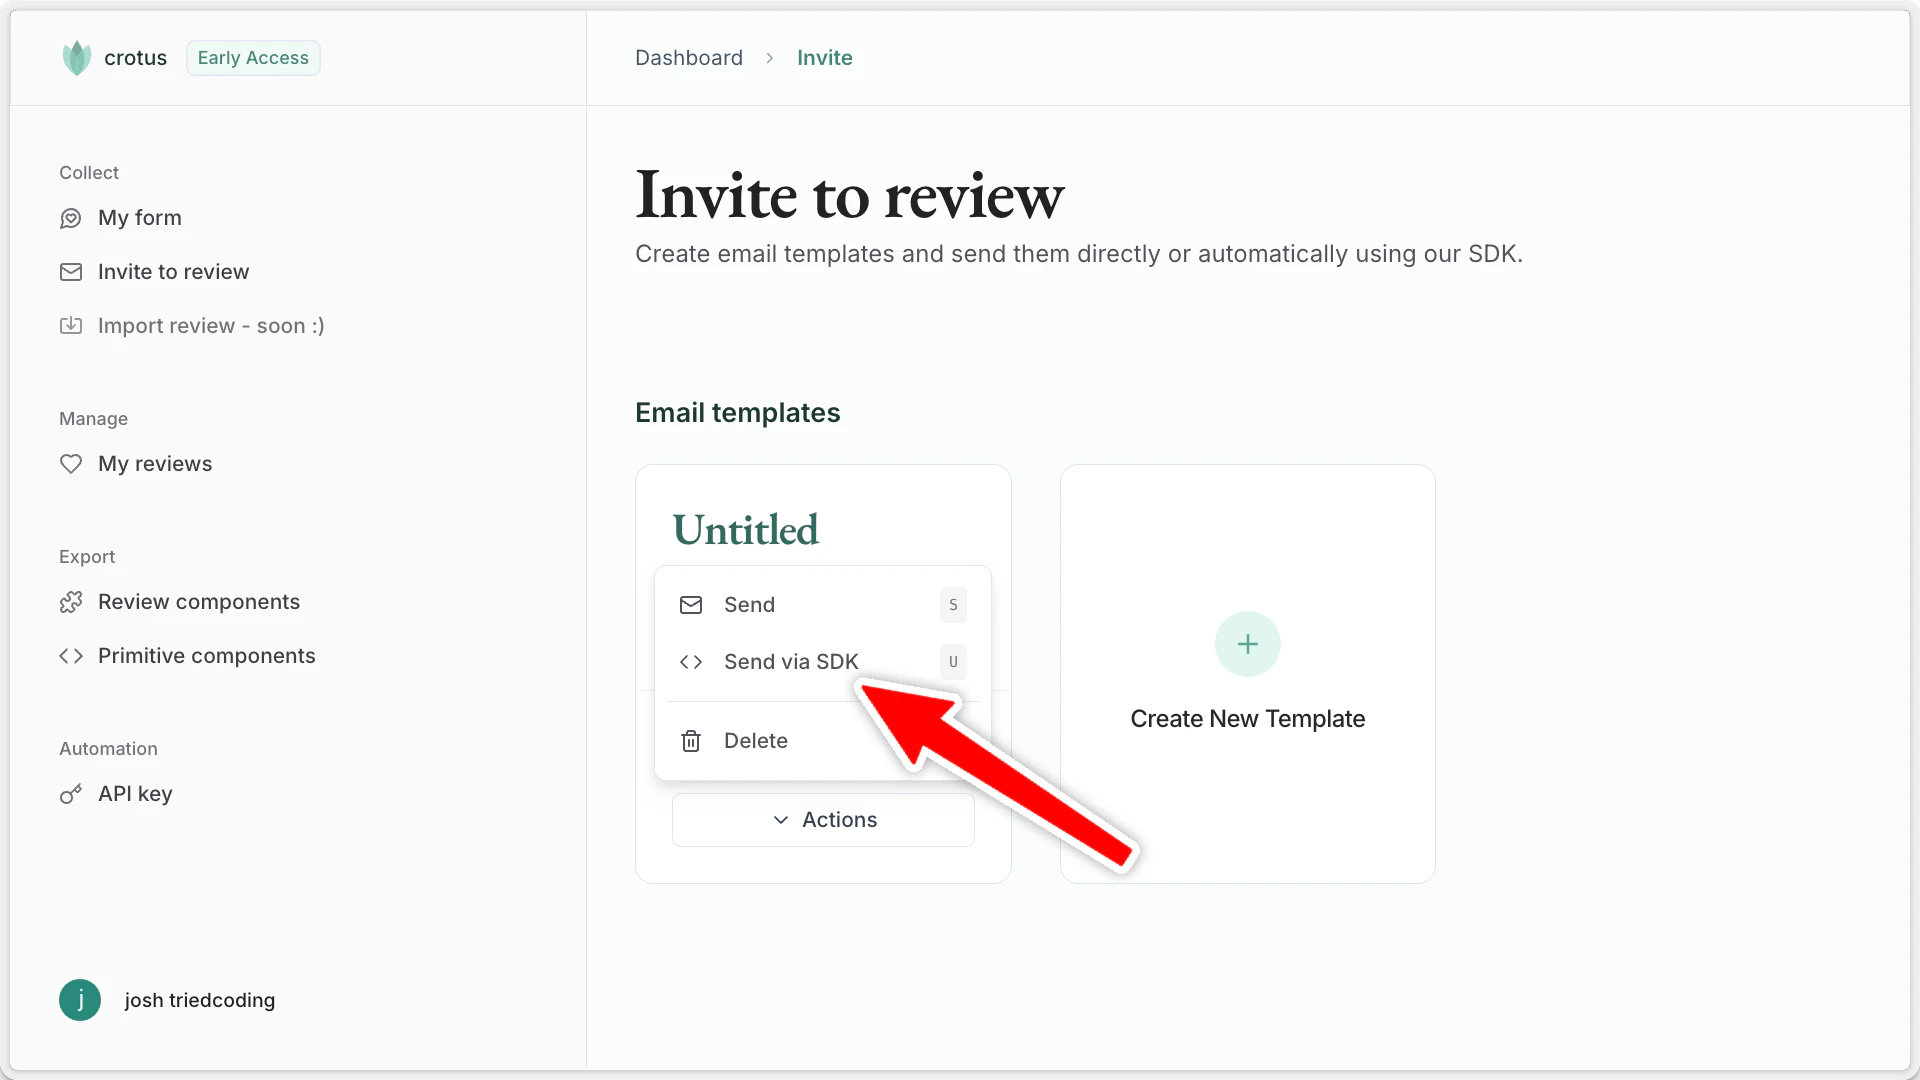
* Click Actions -> Send via SDK on the template.
* Copy the provided code.
#### Option B: Using the SDK
1. Set up the Crotus SDK (see the [quickstart guide](/quickstart)).
2. Copy the code snippet:
* Click Actions -> Send via SDK on the template.
* Copy the provided code.
 3. Paste the code to your application, and ensure you populate `toEmail` and all placeholder values with the correct values at runtime.